We decided in a previous post that our robot was not going to use an ultrasonic sensor. This left us with little option but to sweep the arena until we found our opponent. Being quick, while also powerful this was no issue. With our white deploy-able ramp now in tow we could lift robots up so that they would get false readings or they would just see the colour white and reverse themselves, without us pushing.
We programmed our robot to go forward until it saw white, reverse for 2 seconds, turn for 0.5 seconds then repeat. In practice this worked well and we decided it would work well in competition.
Our new wheels and motors arrived. the motors were smaller than our previously used ones and fit partially into the wheels, a big space saver. We decided as our motors were powerful and our wheels had more than adequate grip that we would use a two wheel and ball system.
The ball eliminated the potential friction problem we had in our race to the wall robot while also moving in every direction, important with a 2 wheel system.
While designing our robot we decided that we would have an endoskeleton for ease of maintenance, such as switching batteries, maintenance with wiring, ability to change ports if necessary and powering up our robot. The power switch was easily accessible from the rear of our bot, and the whole bottom of the robot slid apart, each half connected to a different part of the battery pack, for ease of changing batteries.
Our motors were fixed to our chassis using cable ties. Throughout our testing they held fast and decided that they were good enough for our final bot.
With our new wheels and motors we had some extra space, not enough to fully realise our original wedge concept, however we decided that the core concept of the ramp was worth keeping. We would need to develop an unfolding, space saving ramp.
We achieved this goal by very practical means. We taped a reinforced cardboard sheet to the front of our bot, in a way that was finely enough balanced that if our robot changed direction, the ramp would fall. In testing this ramp would stay up until we reversed, then would fall over 95% of the time.
One issue we did have in our tests was that our robot would rotate on the axis of its wheels when encountering a heavy object. We remedied this by adding a stabiliser leg to the rear. On testing this, we found it to be extremely efficient.
The next step on our robosumo journey was the tip the can competition. Unfortunately we did not receive our ordered parts on time to record an official time, however we decided to pursue the goal none the less, as the learning outcomes from it would be well worth learning. The main component used here will be the ultrasonic sensor.
The ultrasonic sensor works like a bat’s echolocation. It sends out a signal and receives a signal back if there is anything for it to bounce off. The time it takes to be reflected can be used to measure how far away the object is by using the known speed of sound.
We tested the ultrasonic sensor for accuracy by breaking down the speed of sound to give us a reading in centimeters. We were careful to remember that any distance measured would have to be halved (in our ultrasonic sensor code) as we want the actual distance away the object is and the ultrasonic measurement uses echo, which measures there and back . We then used a ruler to check these measurements and the readings were accurate, to within 5%.
With this sensor on our robot the ‘tip the can’ exercise became straightforward. We programmed the robot to spin slowly until it detected an object less than 30 cm away, then drive forward until the distance reading was zero, then reverse for 1 second, then stop.
We incorporated this into our robot for the ‘tip the can’ exercise however we decided against using it in our final competition robot. The sensor was good when detecting flat surfaces however if the surface was angled away from the sensor the echo would not come back to the sensor and it would give false readings.
While looking to buy parts for our robot we had a few options to choose from, however the delivery time was a huge factor to avoid cheap sites, such as AliBaba. In the end we decided we would order our parts from FingerTech Robotics (www.fingertechrobotics.com ), as they had the shortest delivery time and this was a crucial factor as we needed the parts ASAP.
Fingertech have a vast range of purpose built parts for robosumo competitions and hobby projects. In truth there was not much research involved as the ideal parts that we needed almost jumped off the page at us.
We found the perfect wheels relatively quickly. They were ideal for what we needed, small with high traction. The motors were nearly as easy to pick.
We ordered the wheels and motors and continued to work on developing the rest of the robot with these new purchases in mind.
After we got the control and state system for our robot working we moved on to the development of the robot itself. We decided early on that the robot for the race to the wall and the robot for the RoboSumo competition would have completely different designs. Without having to worry about the competition left us free to develop a robot which had the sole focus of the race to the wall.
Our overall design for the Race to the Wall bot didn’t change drastically throughout development, however there were a number of changes we had to make and decisions we came to afterwards.
First Race to The Wall prototype
We did a rough first build of the robot to see how our control system worked and assess the robot in terms of how well the motors, wheels and overall build would work.
We built the robot with the batteries encased in a metal box, with the motors attached underneath. The robot has 2 wheels and a leg for balancing.
This robot did not operate efficiently. It did not move in a straight line, possibly due to the supporting leg being off center and it was overall too slow. The wheels also didn’t seem to have enough traction. We decided that there was a need for change…..
We addressed the traction issue by obtaining an old inner tube from the local bike shop. By cutting a small strip and stretching it around our wheels we greatly increased the traction. We decided to move the motors inside the box so that we cold have a lower ride height as to cut down on the size of the leg needed to balance, in the hope that it would also then cut down how much our robot veered to the side. We also added an extra battery pack to deliver more power to the motors.
Best time
These changes drastically improved our time to 7.355, almost cutting it in half. The robot ran relatively straight but the traction and motor power was still lacking for what we required in the robosumo competition. We decided that this was an area worth investing in and decided to research purpose built wheels and motors.
There are a number of factors we had to take into account when designing our robot. for example would we go light, weak and fast or heavy, powerful and slow? Would we be building and mounting our electronics on a base or would we be enclosing and protecting them? What would we be using for our wheels? Would we go for the robustness of a nut and bolt fixing or would we use the glue gun? What shape and tactics would we use?
Design Stage
After researching previous competitions and other designs we decided that a 2-wheeled wedge shaped robot was the most popular choice, and for good reason. The wedge shape prevents the robot being pushed and lifts the opposing robots sensors off the ground, giving false readings.
The other main design choice we looked into was building a heavy block shaped robot with high torque so it could push anything out of the arena, however with our research on the wedge shape in mind, we decided that was not the best way to go as we would be weak against the popular wedge shape robot.
With the wedge shape we decided that it was important for the robot to be able to build up speed as it made its way around the arena. This led us to the ideas for weight reduction such as using solder instead of connectors, glue instead of nuts and bolts.
Taking this idea from design concept into the real world we measured and weighed our components and found out that because of the 10 x 10 cm size limitation that a wedge was going to be extremely tight space wise. If we are going to use our original design we would have to be heavily adapt it, making a less gradual slope to allow room for our power supply, arduino, motors and wheels.
In this blog post we will continue the research and development for the race to the wall. In the previous post we covered the infrared sensor which will be used to detect the stop line. In this post we will look at Motor Control and investigate wall detection.
Motor Control
Our motors for our robot will be controlled using a H-bridge set up. This prevents a motor trying to go forwards and backwards at the same time.
Inside the L293 is a set of diodes which switch appropriately to stop the motor getting damaged by going against itself. For our original tests we used a 2 way, 2 colour diode set up, with opposite polarity. This would give us a clear indication of what was happening without putting the motors at risk.
We changed from forward to reverse by using states, using a push button to change between them. This process was straightforward and didn’t cause us too much trouble.
Delay and Changing Direction
Here we will look at the remaining transitions, starting 5 seconds after button being pressed and also changing direction after touching the wall.
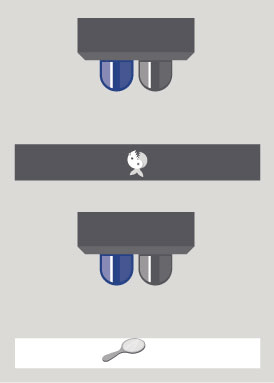
The delay was easy to implement, we just triggered a 5 second start delay from a push button. The change of direction wasn’t as clear. We debated using an ultrasonic sensor (covered in a future blog post), however we discovered a much simpler option. We used 2 bare cables twisted, but not touching, at the front of our robot. When these hit the wall, they would make contact with each other and switch the state of the robot to the reverse state.
Mock Test
We decided to do a mock test of the code and states before developing our chassis. The red LED represents motors going forward and green LED is reverse. We can see below that the mock robot is started on the press of a button, reverses when the bare cables connect and then stops when the infrared sensor reads black. This is an accurate representation of what is required for the race to the wall.
This week we got our second competitive challenge following the LED flash. We would have to build a robot to race to a wall, over a black starting strip and back to said strip where it would need to stop, while breaking a laser line. This would be a timed challenge.
We started by developing our knowledge regarding the black/white (infrared) sensor.
Infra red Sensor
The sensor works by sending out a signal on one side and measuring the amount of light reflected back on the other side. This sensor can give an analog value depending on what shade of grey it sees. It ranges between 0-1023 where black is 0 and pure white is 1023. this can be split between high and low for a binary input if so desired.
Testing the sensor
We tested the analog value of the sensor at various distances and found out the sensor had to be relatively close to the surface used. This is because it works off light reflected back, so you cannot have the sensor completely on the ground as there won’t be room for the light to bounce back. The same will happen if the distance is too great for the light to bounce back. In both cases the sensor will see black. We established from this experiment that the sensor was reliable when kept near the surface.
Results
Using this information we decided to mount 2 sensors at the base of our robot and also to try prevent our robot being lifted, as to prevent false readings. We also decided that trying to give our opponents false readings by using a white strip near the base of our own robot might be a good idea.
This week we would be learning how to program a set of LEDs to represent traffic lights at a junction. We programmed the different stages of light combinations using states. A state gives a specific set of instructions whilst in that state, allowing complex tasks to be broken down and done simply. A state can have a transition to any other states given a certain condition.
The states in our experiment could either be changed from a physical input (button press) or a timer or a combination of both.
Working with state machines is convenient as you can break down each state seperately and mistakes in each state don’t affect other parts of the program. Because of this it is usually easy to identify where the problems are during troubleshooting.
In this lab we were representing a set of traffic lights with coloured LEDs. The traffic lights operated by changing state when a button was pressed, changing from green to yellow to red using delays between states. after a set time, equivalent to a person crossing the road, the light would turn green again.
We decided from this experiment that we would rely heavily on states whilst developing our own robot.
In the first week we got placed into teams. I got placed on a team with Glenn Neale. We were given a pack with the basic electronics we’ll need for building and controlling our robot. We have to source our own wheels and body.
In our first exercise the goal was to send a message in binary through flashing LEDs. This was achieved through 2 alternating flashing LEDs, one for 0 and one for 1 and a small delay timer.
We learned how to write the code for the arduino to change the output pins high or low and also hot to incorporate a specific delay